
The following components are required for this lesson.
| Components |
|---|
| Arduino Board |
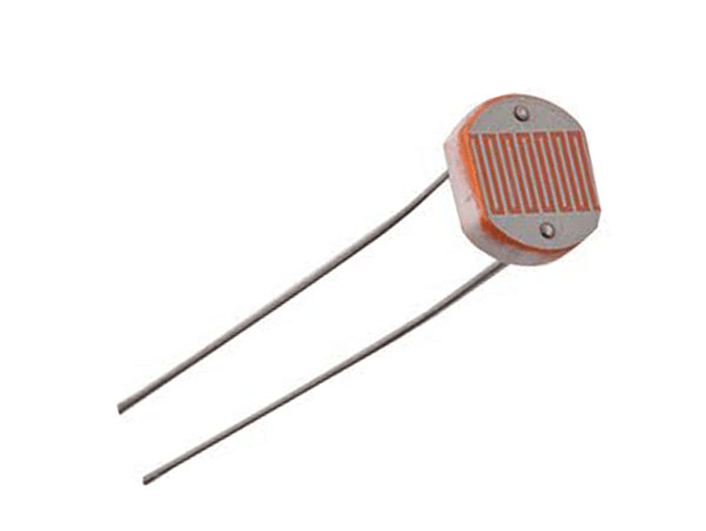
| Light Sensor (CdS Cell) |
| Servo Motor |
| Resistor (220Ω) |
| LEDs |
| Breadboard |
| Breadboard wire links |
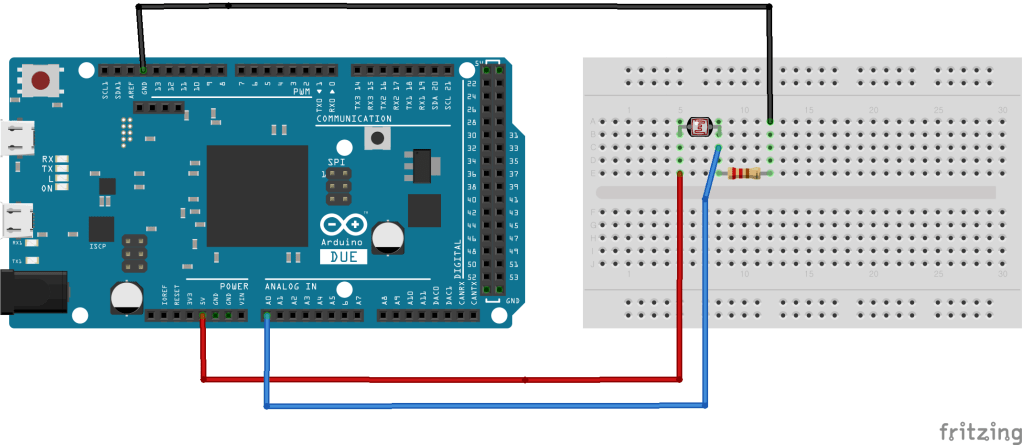
Arduino-Light Sensor Reading Wiring Diagram
Arduino-Light Sensor Reading Code in Arduino
int photoPin = A0;

void setup() {
  Serial.begin(9600);
}

void loop() {
  int light = analogRead(photoPin);
  Serial.println(light);
  delay(100);
}
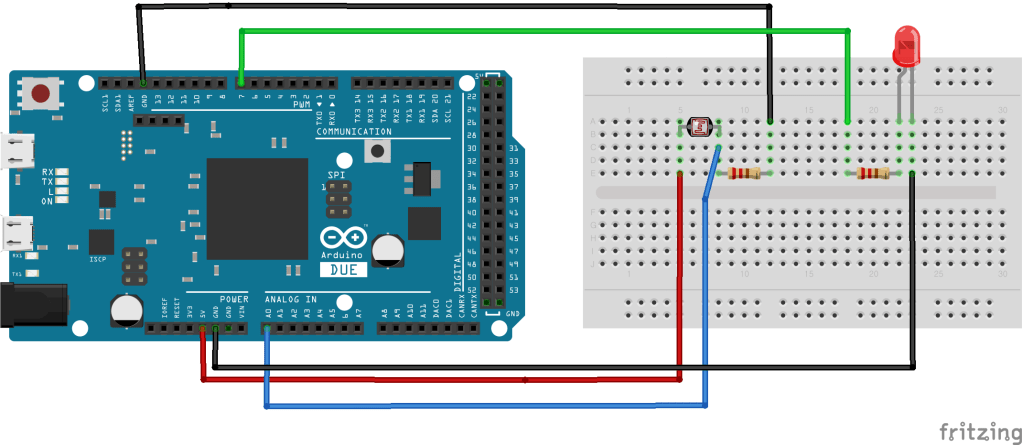
Arduino-Light Sensor-LED Wiring Diagram
Arduino-Light Sensor-LED Control Code in Arduino
int photoPin = A0;
int ledPin = 7;

void setup(){
  pinMode(ledPin, OUTPUT);
  Serial.begin(9600);
}

void loop(){
  int lightRaw = analogRead(photoPin);
  int light = map(lightRaw, 0, 1023, 0, 100);
  Serial.println(light);

  if (light < 5) {
    digitalWrite(ledPin, HIGH);
  }
  else {
    digitalWrite(ledPin, LOW);
  }
}
Arduino-Light Sensor-LED Control Demo:

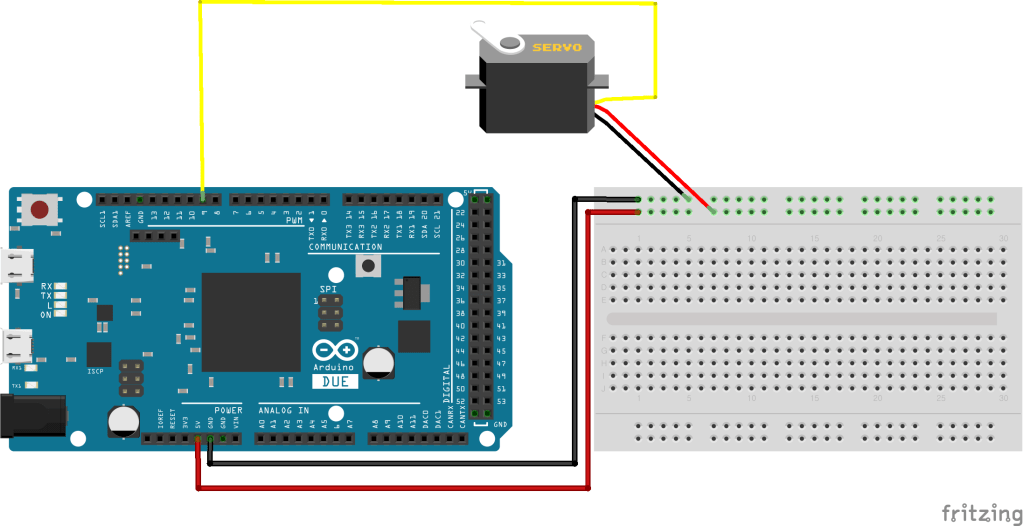
Arduino-Servo Motor Wiring Diagram
Arduino-Servo Motor Control Code in Arduino
#include <Servo.h>

Servo myservo;  // create servo object to control a servo
// twelve servo objects can be created on most boards

int pos = 0;    // variable to store the servo position

void setup() {
  myservo.attach(9);  // attaches the servo on pin 9 to the servo object
}

void loop() {
  for (pos = 0; pos <= 180; pos += 1) { // goes from 0 degrees to 180 degrees
    // in steps of 1 degree
    myservo.write(pos);              // tell servo to go to position in variable 'pos'
    delay(15);                       // waits 15ms for the servo to reach the position
  }
  for (pos = 180; pos >= 0; pos -= 1) { // goes from 180 degrees to 0 degrees
    myservo.write(pos);              // tell servo to go to position in variable 'pos'
    delay(15);                       // waits 15ms for the servo to reach the position
  }
}
Arduino-Light Sensor-Servo Motor Wiring Diagram
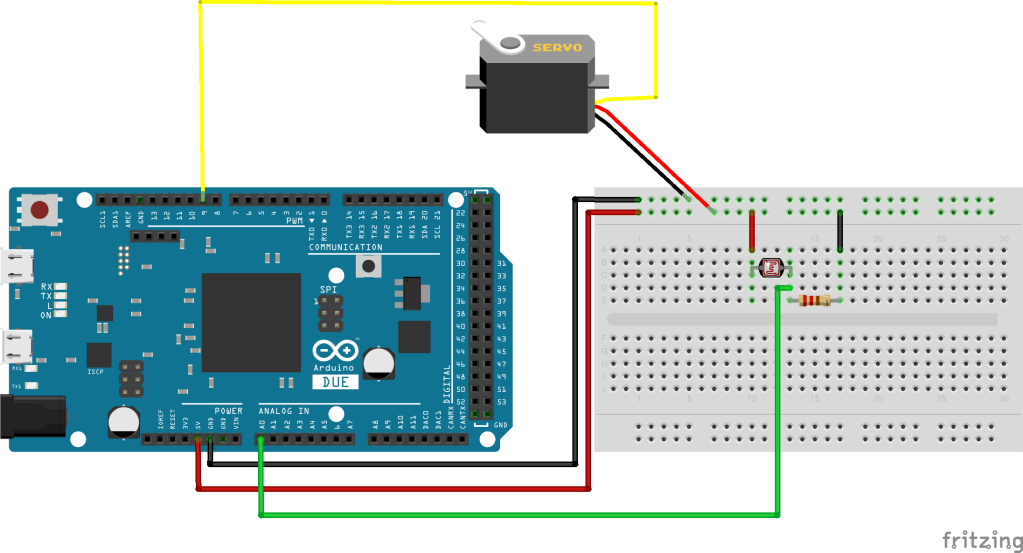
Arduino-Light Sensor-Servo Motor Control Code in Arduino
#include <Servo.h>
int photoPin = A0;
Servo myservo;  // create servo object to control a servo
int pos = 0;    // variable to store the servo position

void setup() {
  myservo.attach(9);  // attaches the servo on pin 9 to the servo object
 Serial.begin(9600);
}

void loop() {
 int lightValue = analogRead(A0);
 int lightRaw = analogRead(photoPin);
 lightValue = map(lightValue,0,1023,0,180);
 myservo.write(lightValue);
 Serial.println(lightRaw);
}
Arduino-Light Sensor-Servo Motor Control Demo
Solar Tracker Application Wiring Diagram
Solar Tracker Application Code in Arduino
#include <Servo.h>
int photoPin1 = A0;
int photoPin2 = A8;


Servo myservo;  // create servo object to control a servo
// twelve servo objects can be created on most boards

int pos = 0;    // variable to store the servo position

void setup() {
  myservo.attach(9);  // attaches the servo on pin 9 to the servo object
 Serial.begin(9600);
}

void loop() {
 int lightValue1 = analogRead(A0);
 int lightRaw1 = analogRead(photoPin1);
 int lightValue2 = analogRead(A8);
 int lightRaw2 = analogRead(photoPin2);


 lightValue1 = map(lightValue1,0,1023,0,180);
 lightValue2 = map(lightValue2,0,1023,0,180);

 Serial.print(lightValue1); Serial.print(',');Serial.println(lightValue2);
 myservo.write(lightValue1);

if(lightValue1<10){
 for (pos = 0; pos <= 180; pos += 1) { // goes from 0 degrees to 180 degrees
    // in steps of 1 degree
    myservo.write(pos);              // tell servo to go to position in variable 'pos'
    delay(15);                       // waits 15ms for the servo to reach the position
  }
  }
 if(lightValue2<10){
  for (pos = 180; pos >= 0; pos -= 1) { // goes from 180 degrees to 0 degrees
    myservo.write(pos);              // tell servo to go to position in variable 'pos'
    delay(15);                       // waits 15ms for the servo to reach the position
  }
  }
}
Solar Tracker Application Demo


Leave a comment